Continuous Integration With Jenkins Part I

Continuous integration or CI, is all the rage these days. If you’re not familiar with what CI is, it’s basically a methodology for rapidly developing, testing and deploying applications. Using a well configured CI setup or pipeline, a developer or team of developers can make a change to their codebase, test those changes to make sure they didn’t break those changes and then push that code live in a matter of minutes. They can do this all day long and rest assured that their changes are good to go on their production servers.
There are many ways to do this but one of the most popular tools used these days is Jenkins. Jenkins is a web application written in Java that helps to automate building, testing and even deploying your application. Jenkins, along with a a whole slew of plugins, can do most of the heavy lifting in your CI pipeline.
At first glance, Jenkins looks pretty complicated to setup but after playing around with it myself, I’ve found it’s pretty simple.
In this first part I’m going to go over how to get Jenkins setup to build a simple PHP app, run some tests and publish the results. Most other tutorials I’ve found include fancy build scripts for a powerful tool called Ant. Those can get pretty complicated so I won’t include anything like that in this part. We just want to get something running so you can see some results.
###Installation Installation is not in the scope of this article. Please refer to the documentation on the Jenkins website or Google for instructions on installing it on your OS of choice. It should be as simple as ‘yum install jenkins’ or ‘apt-get install jenkins’ depending on your setup.
###PHP As we will be working with a PHP application, our Jenkins server will need it’s own instance of PHP. For this example we need version 5.4 or higher. Install based on your OS.
###Git We will need Git installed in order to fetch source code to build and run our tests. Install based on your OS.
###Composer Part of the build process will include downloading dependencies using Composer. You can install it globally like so.
php -r "readfile('https://getcomposer.org/installer');" | php
sudo chmod +x ./composer.phar
sudo cp ./composer.phar /usr/local/bin/composer
###Plugins Jenkins has a huge collection of useful plugins available. We’re going to need a few in order to run our build.
You can install these through the Jenkins dashboard but you can also install them through the command line like this.
wget http://localhost:8080/jnlpJars/jenkins-cli.jar
java -jar jenkins-cli.jar -s http://localhost:8080 install-plugin htmlpublisher git
java -jar jenkins-cli.jar -s http://localhost:8080 safe-restart
###The Build If you have Jenkins installed correctly you should be able to reach the dashboard by pointing your browser to the server it’s installed on using port 8080 (e.g. http://myjenkins.com:8080).
Once there you should see a screen like this.
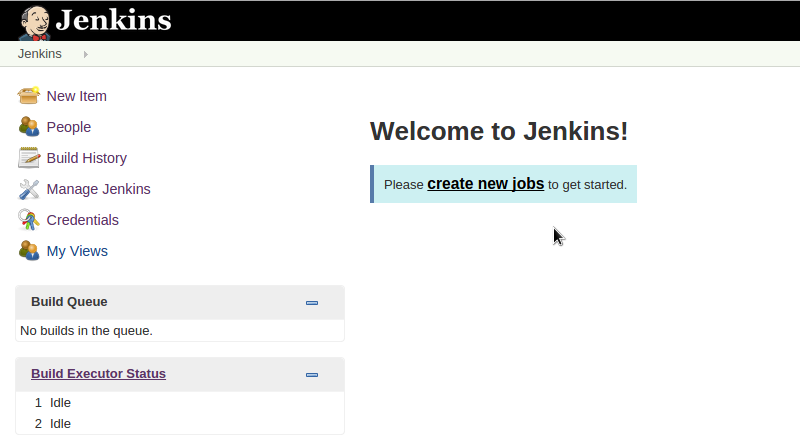
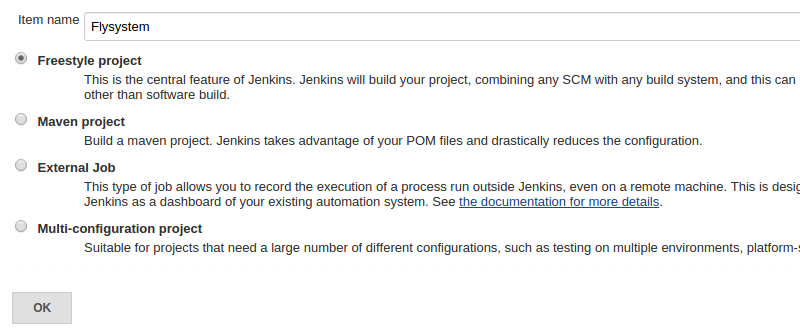
Click on “Create new jobs”. We’re going to use an existing open source project called Flysystem for our build test so we’ll just call our build “Flysystem” and we’re going to create a “Freestyle” project. Click “Ok” to continue.
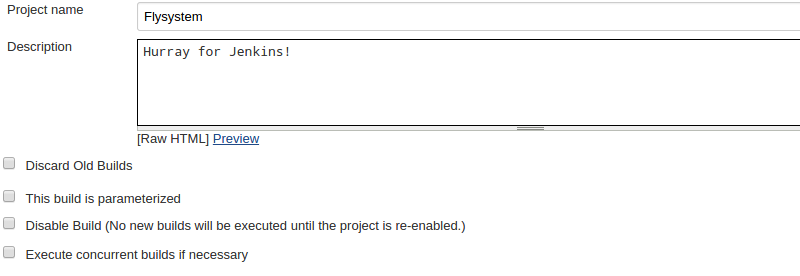
We can give our project a description if we like.
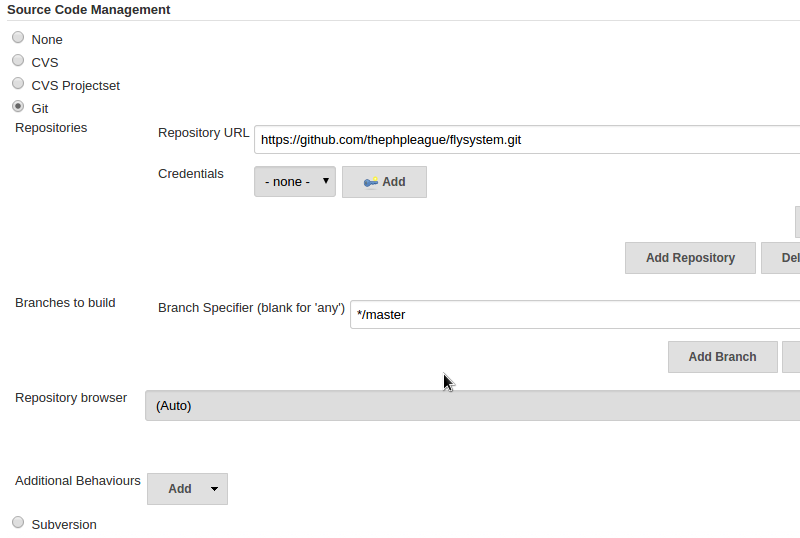
Now down in the “Source Code Management” section we’ll select “Git” and set the repository to https://github.com/thephpleague/flysystem. You can safely leave everything else as default.
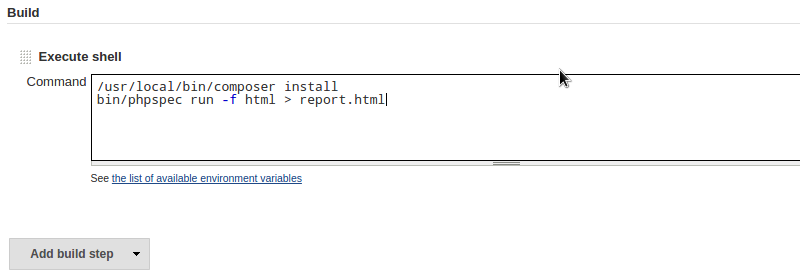
Under the “Build” section we set up the different steps for building and testing our applications. Click on “Add build step” and select “Execute shell”. This is a quick and dirty way to run various build commands without having to create a complex XML build script for use with Ant or Maven. Add the following commands in the textbox.
/usr/local/bin/composer install
bin/phpspec run -f html > report.html
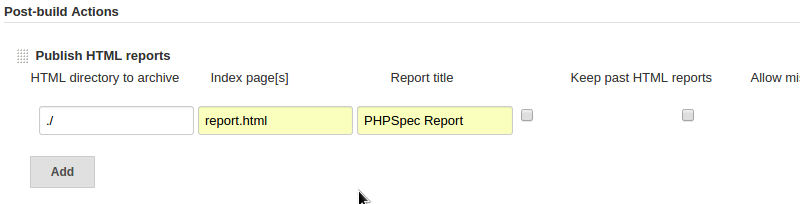
The great thing about Jenkins is that with the right plugins you can create all kinds of useful reports for every build of your application. In our build step we’re running phpspec for tests and setting the output format as HTML and saving it to a file. Jenkins can take that HTML and publish it for viewing later. . Under “Post-build Actions” click on “Add post-build action” and select “Publish HTML Reports”. Fill out the textboxes like so.
Hit save and that’s it. On the left side menu click “Build Now”. You should a little blinking dot appear under “Build History”. Click on it and then click on “Console Output”. You should see a bunch of text scrolling past as the build runs. It should look something like this.
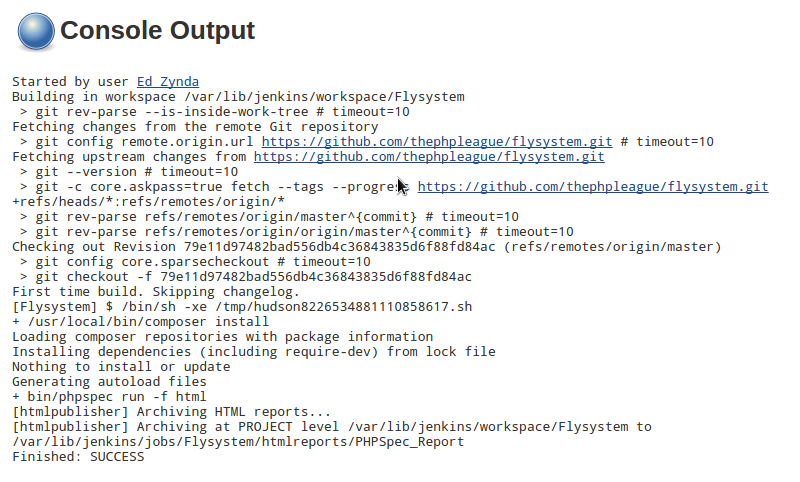
It might take a few minutes if this is the first time running the build as composer is downloading dependencies from scratch.
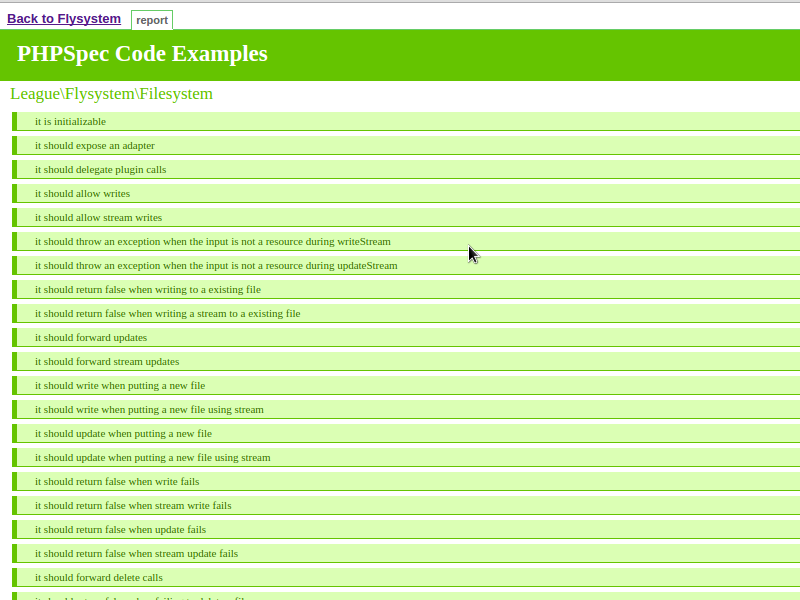
Now click “Back to Project” and then click “PHPSpec Report”. This is the nice HTML report we had published. This wil list out all the tests that were run. Tests that passed will be green while any that have failed will be red and usually give a stack trace with details on why it failed.
That’s basically all you need to get a simple build running on Jenkins. Of course there is a lot more you can do but that will be covered in a later post.
